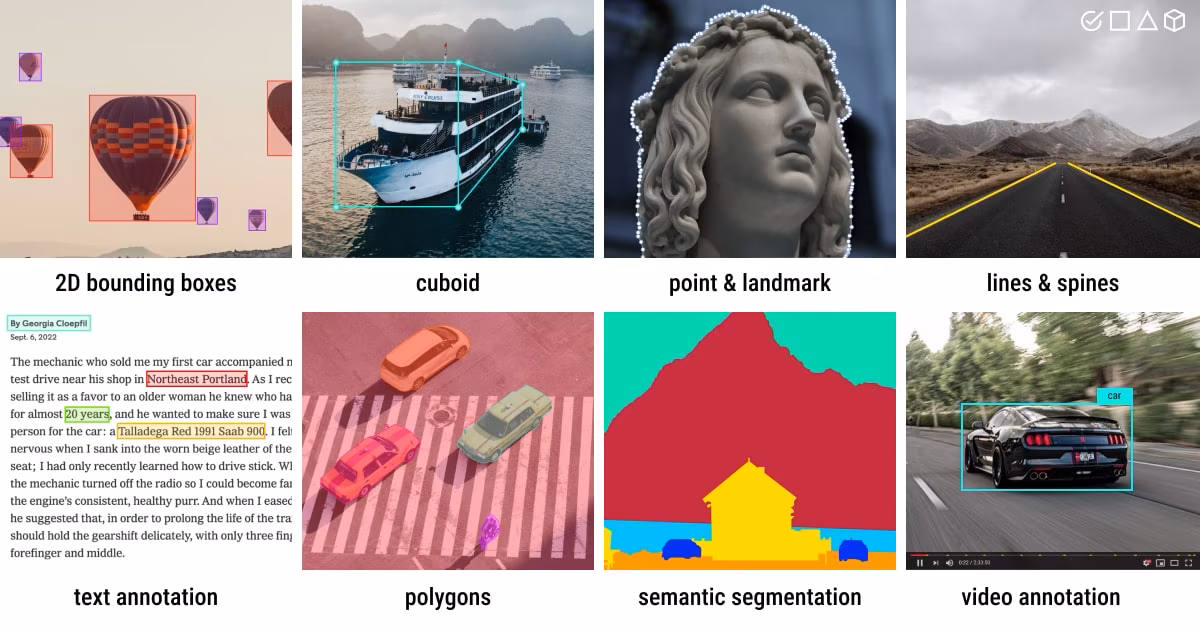
Annotation Best Practices
Write a labeling guide, pick a tool, and apply rules that keep 10 annotators producing the same labels.
Good labels beat almost every other improvement. A model trained on consistent, tight labels and 1500 images per class will outperform a model trained on sloppy labels and 5000. Annotation is where production-ready datasets are made or broken.
Write a labeling guide, pick the right annotation tool for your task and team, and apply consistent rules across every image.
Write a labeling guide before annotation starts.
Tight boxes / masks / keypoints — no slack between object and label.
Label every relevant object in every image. Partial labeling produces partial models.
Document every ambiguous case as it appears, not after.
Hands-on
Link to this sectionPick the annotation tool#
The right tool depends on your task, team size, and integration needs:
| Tool | Best for | Notes |
|---|---|---|
| Ultralytics Platform | All 6 YOLO tasks; SAM-powered smart labeling for boxes/masks; built-in QC | Recommended default; same surface as training; no export step |
| CVAT | Large enterprise teams, complex workflows, video | Self-hosted option |
| Label Studio | Multi-modal projects (image + text + audio) | Flexible config, larger learning curve |
| Labelme | Polygon segmentation, small teams | Simple, single-user friendly |
| LabelImg | Quick bounding-box-only datasets | Lightweight, good for prototypes |
For most enterprise projects starting today, Ultralytics Platform is the shortest path from images to a YOLO-ready dataset — it ships with SAM 2.1 / SAM 3 smart annotation, all 6 task types, automatic statistics, and a direct path to cloud training.
Link to this sectionThe six label types at a glance#
| Type | What you draw | Used for |
|---|---|---|
| Bounding box | Axis-aligned rectangle | Detection |
| Oriented box | Rotated rectangle | OBB for top-down / aerial |
| Polygon / mask | Pixel-precise instance outline | Instance Segmentation |
| Dense mask | Pixel-level class map | Semantic Segmentation |
| Keypoints | Set of named joints | Pose |
| Class label | One label per image | Classification |
Link to this sectionWrite the labeling guide first#
Before any annotator starts, write a labeling guide. Five sections:
- Class definitions — one paragraph per class with positive examples, negative examples (what isn't this class), and edge cases.
- Drawing rules — tight boxes, full-extent polygons, single-class-per-instance.
- Occlusion rules — when to label a partial object, when to skip.
- Ambiguous cases — the gallery of "we agreed to do it this way" decisions; grows as the project goes.
- What to skip — anything not worth labeling for this task.
A page or two is plenty once you add screenshots. Update it when annotators ask "what about this one?" — the question itself is a guide entry.
Link to this sectionThe non-negotiable rules#
These five rules separate datasets that train well from datasets that don't:
- Label every relevant object in every image. A model trained on partially-labeled images learns "sometimes objects are background" — and stops finding them.
- Tight boxes / masks. No slack — labels must closely enclose each object, with no space between an object and its bounding box.
- Consistent class definitions. A "pallet" must mean the same thing across every annotator and every shift. The labeling guide is how you enforce this.
- Handle occluded / partial objects consistently. Pick one rule (e.g. "label if ≥ 50% visible") and stick to it.
- Document every ambiguous case as you go. Once decided, the call is in the guide forever.
A dataset where some images have 100% of their objects labeled and others have 50% looks identical to a 100%-labeled smaller dataset — until you train. The model can't tell the difference between "this is background" and "this is an unlabeled object" — so it learns both. Pick one image, label every object; pick the next, label every object. Always.
Link to this sectionCommon annotation mistakes#
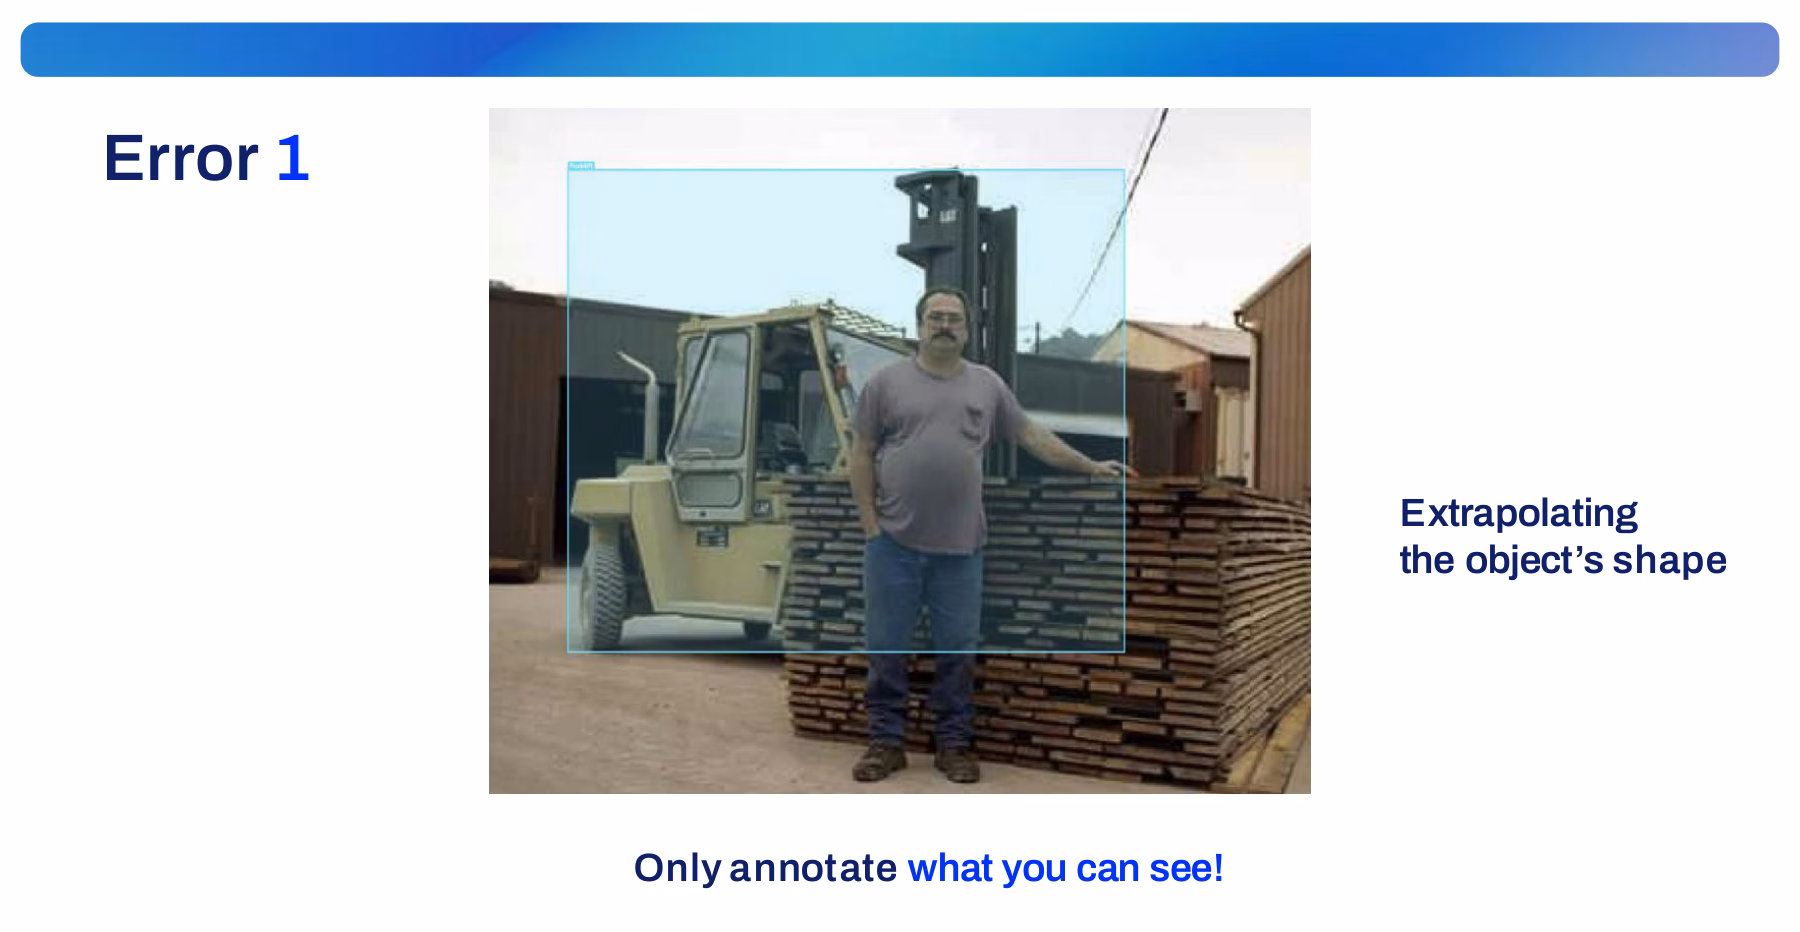
The annotation errors the Ultralytics annotation team sees most often — each one quietly costs accuracy. The examples use a forklift / person / pallet warehouse dataset, and are adapted from a deck by Alexis Schutzger.
1. Extrapolating the object's shape. Only annotate what you can see. When a forklift is half-hidden behind a rack, box the visible part — not where you imagine the rest continues.
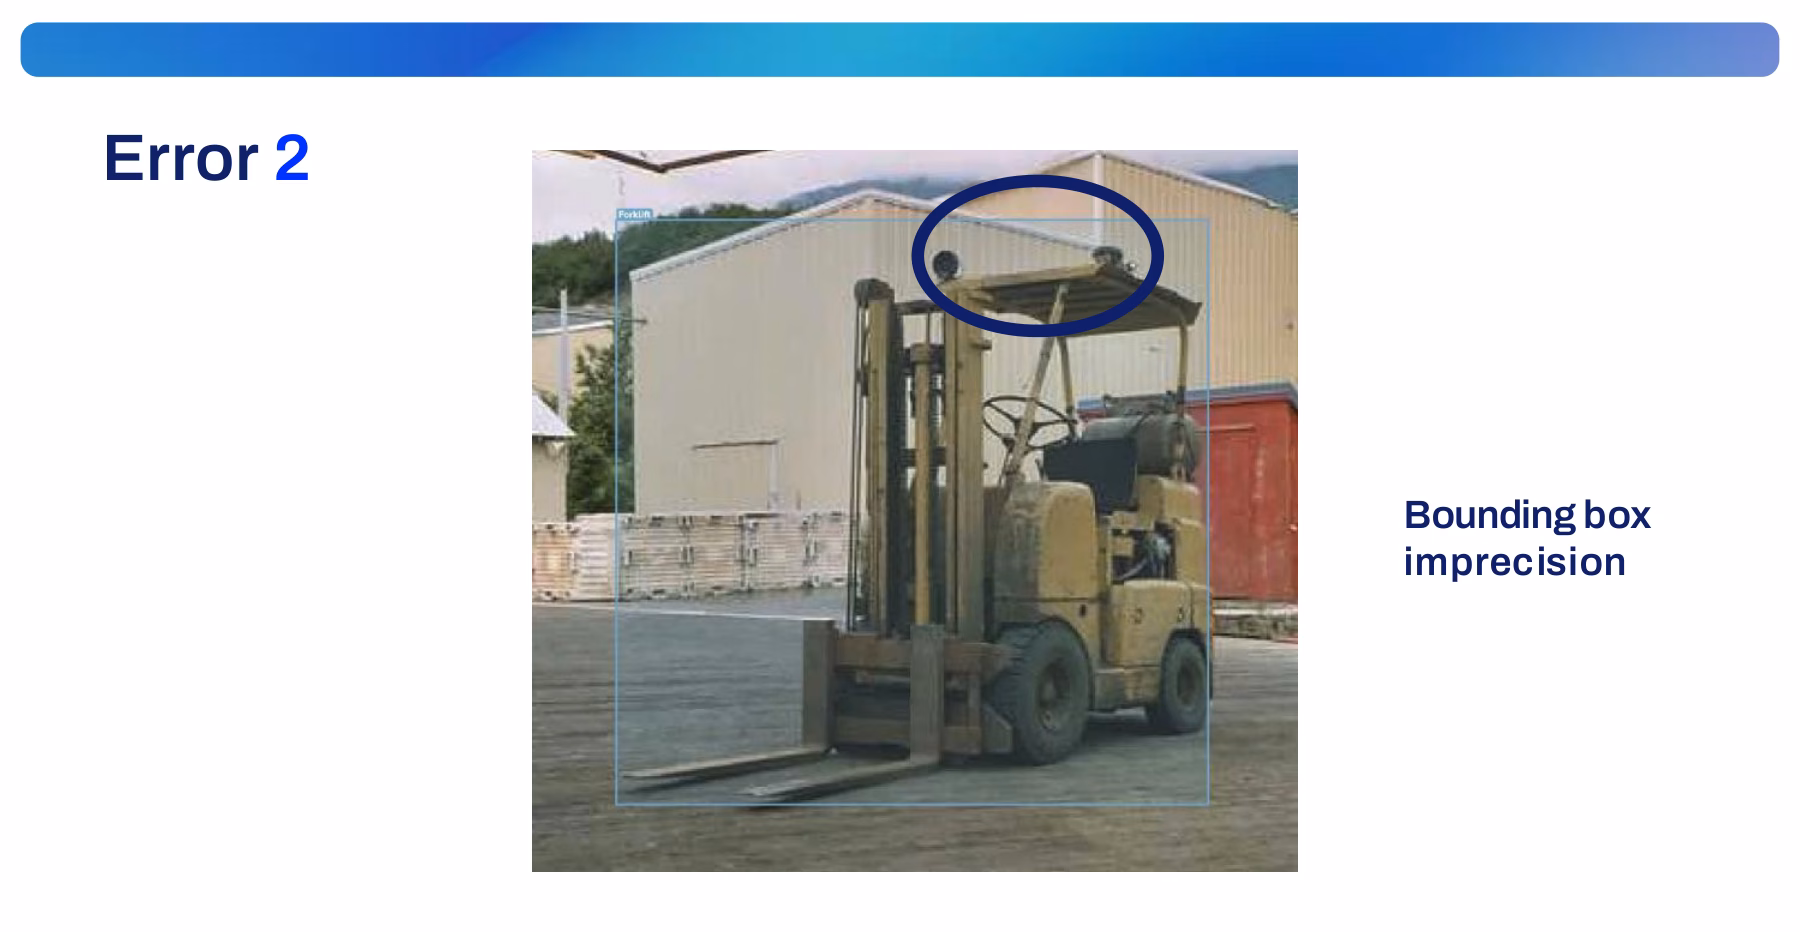
2. Imprecise bounding boxes. Boxes must hug the object. A box that leaves a margin of floor, or clips a person's feet, teaches the model the wrong extent.
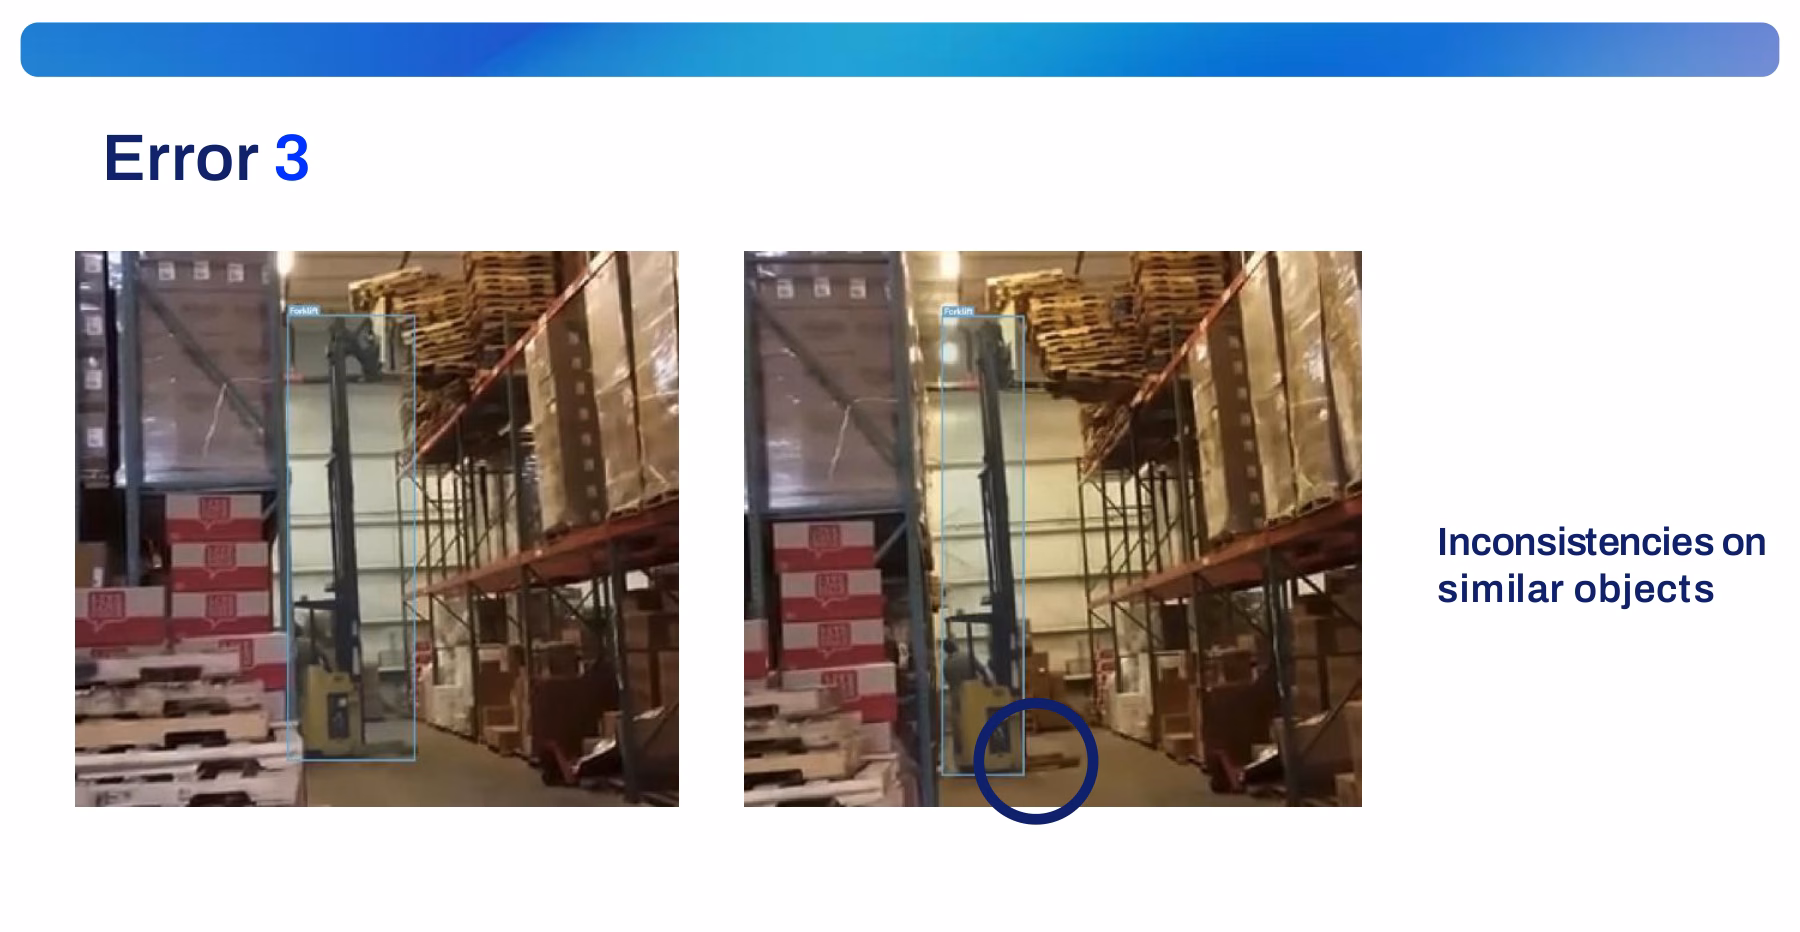
3. Inconsistencies on similar objects. Box similar objects the same way every time. If one forklift includes its forks and the next excludes them, the model gets mixed signals.
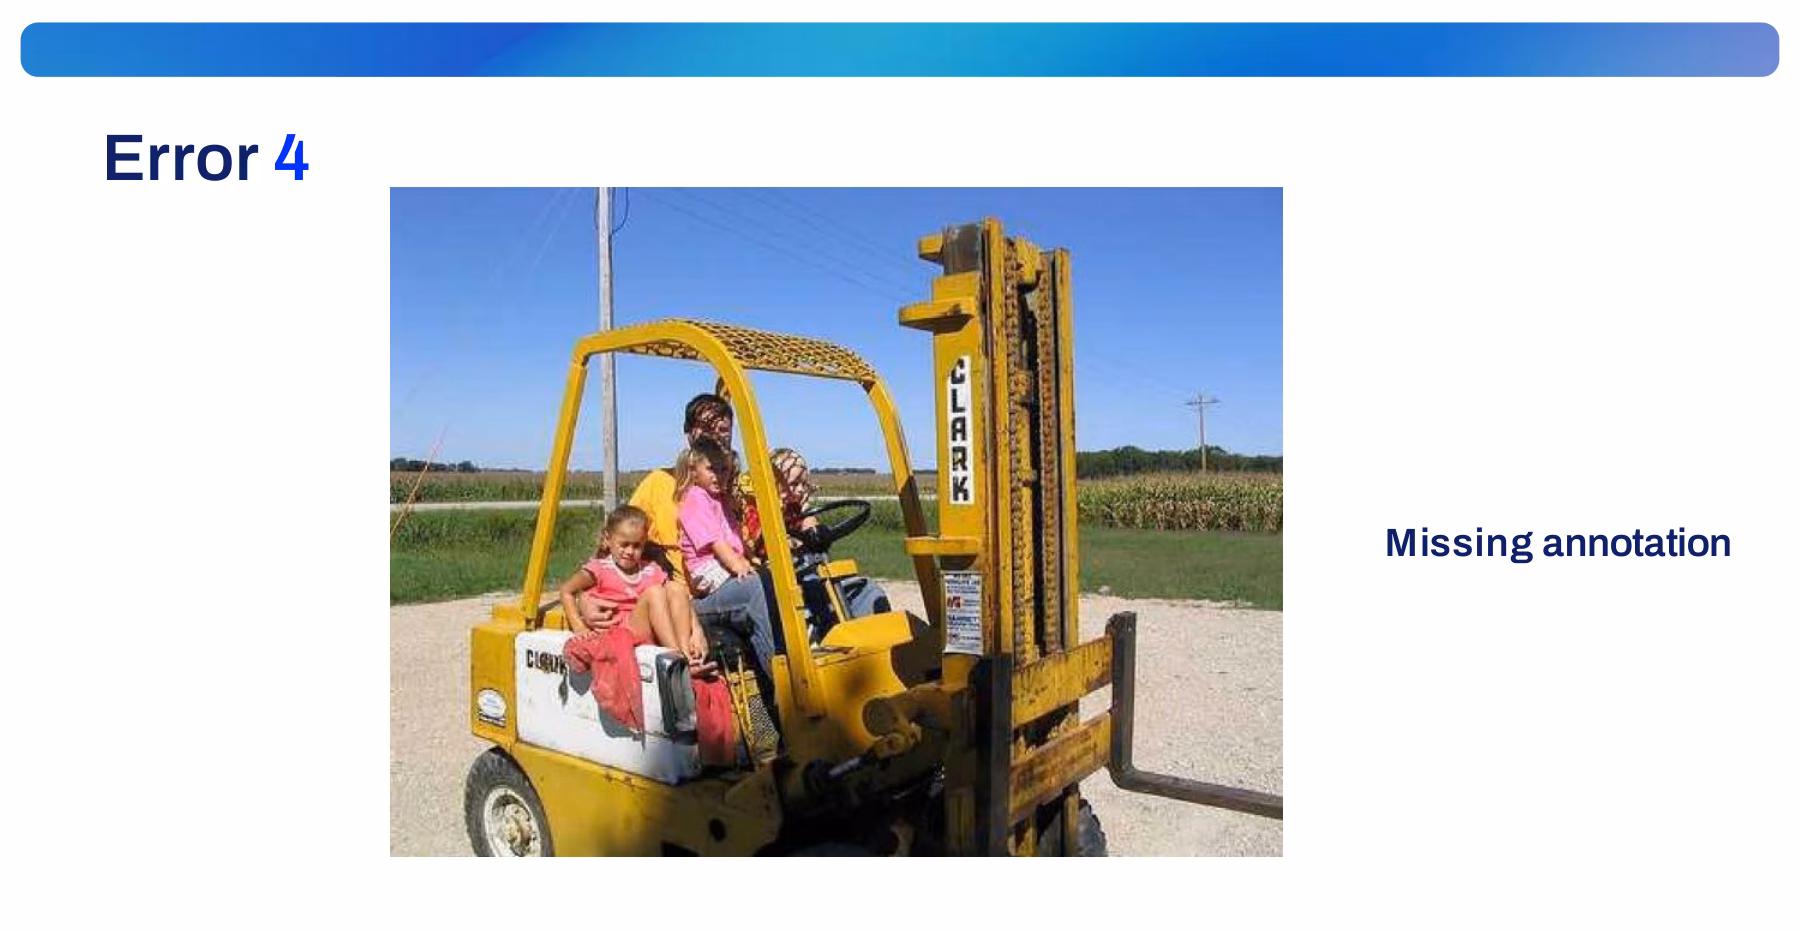
4. Missing annotations. Label every instance — here six people are in frame but only five are boxed.
5. Wrong label. Verify the class, not just the box. A correct box around a person tagged forklift corrupts both classes — usually a keyboard-shortcut slip.

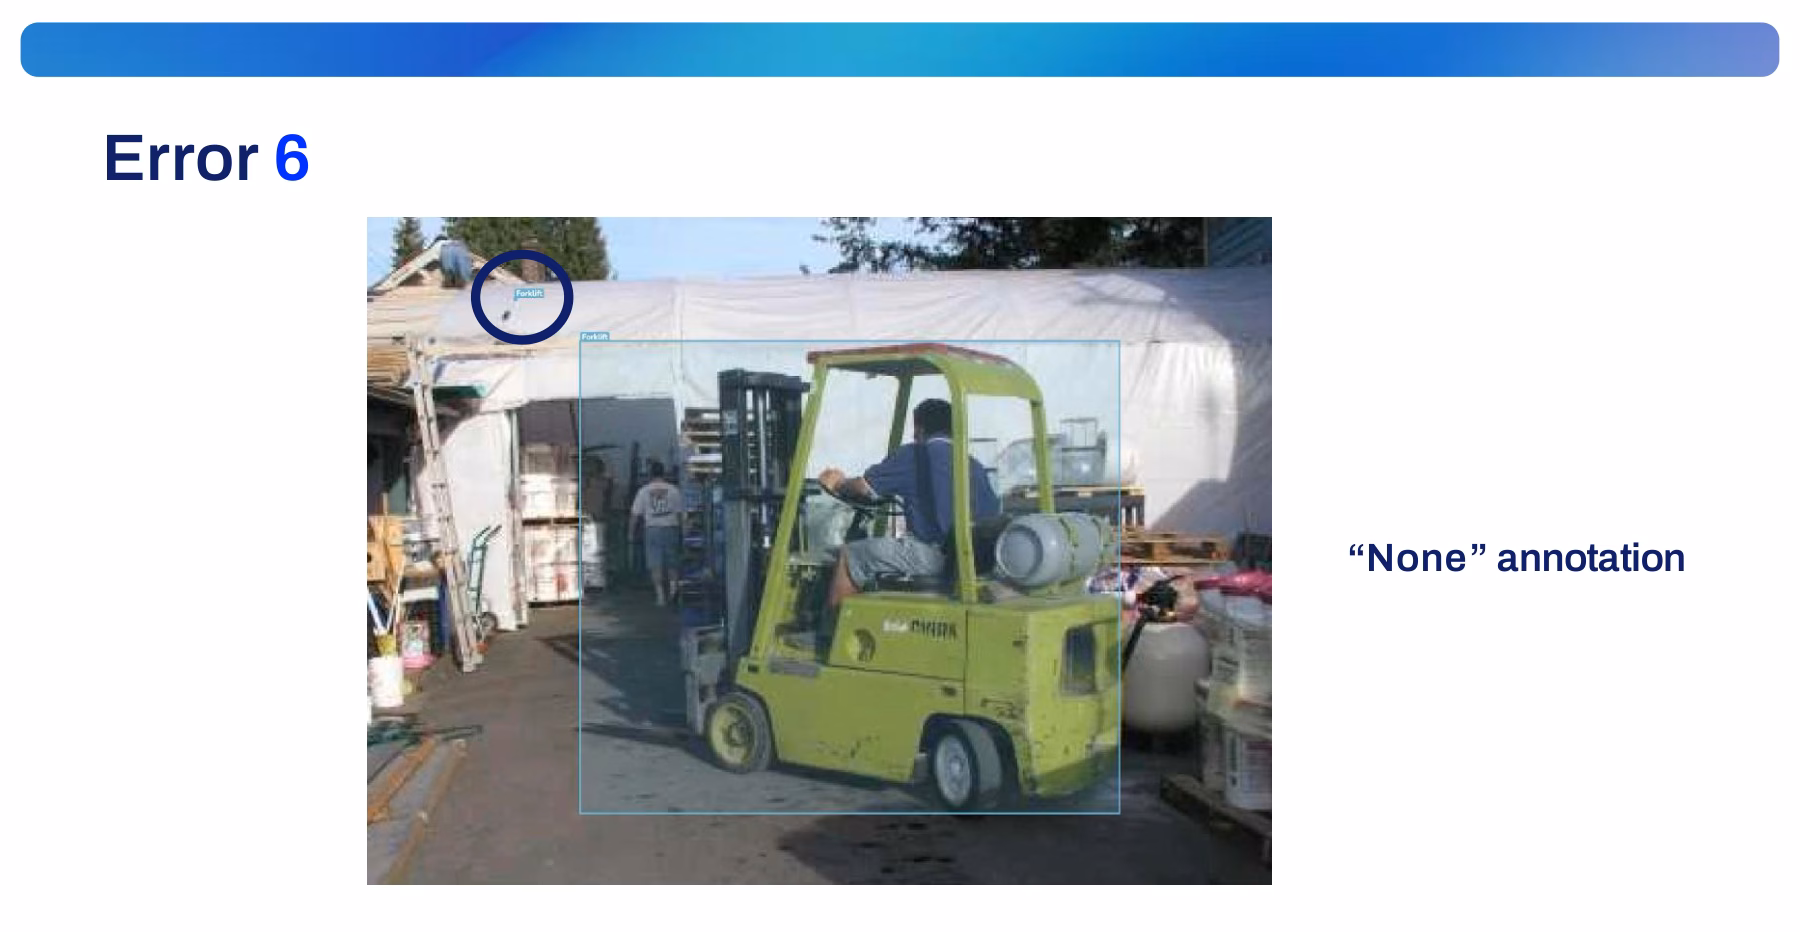
6. "None" / empty class. Every box needs a real class. A box drawn without a class selected exports as None (or class 0) and silently poisons the labels — assign it or delete it.
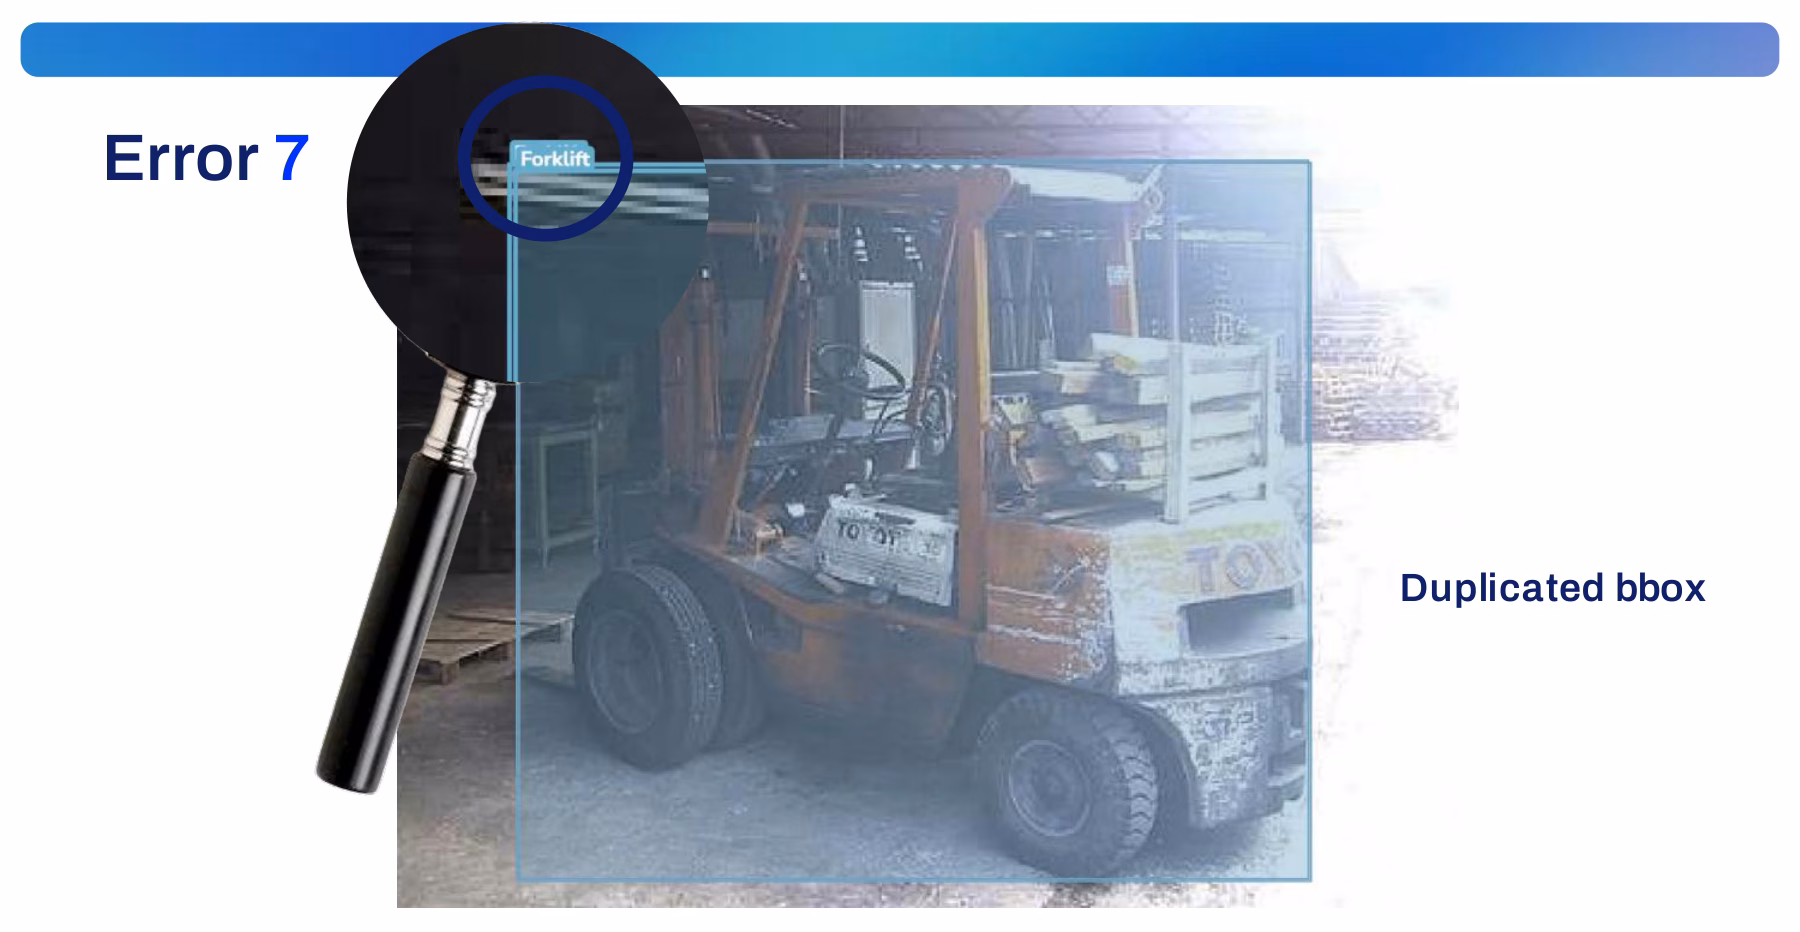
7. Duplicated box. One object, one box. Two overlapping boxes on the same forklift inflate instance counts and confuse training.
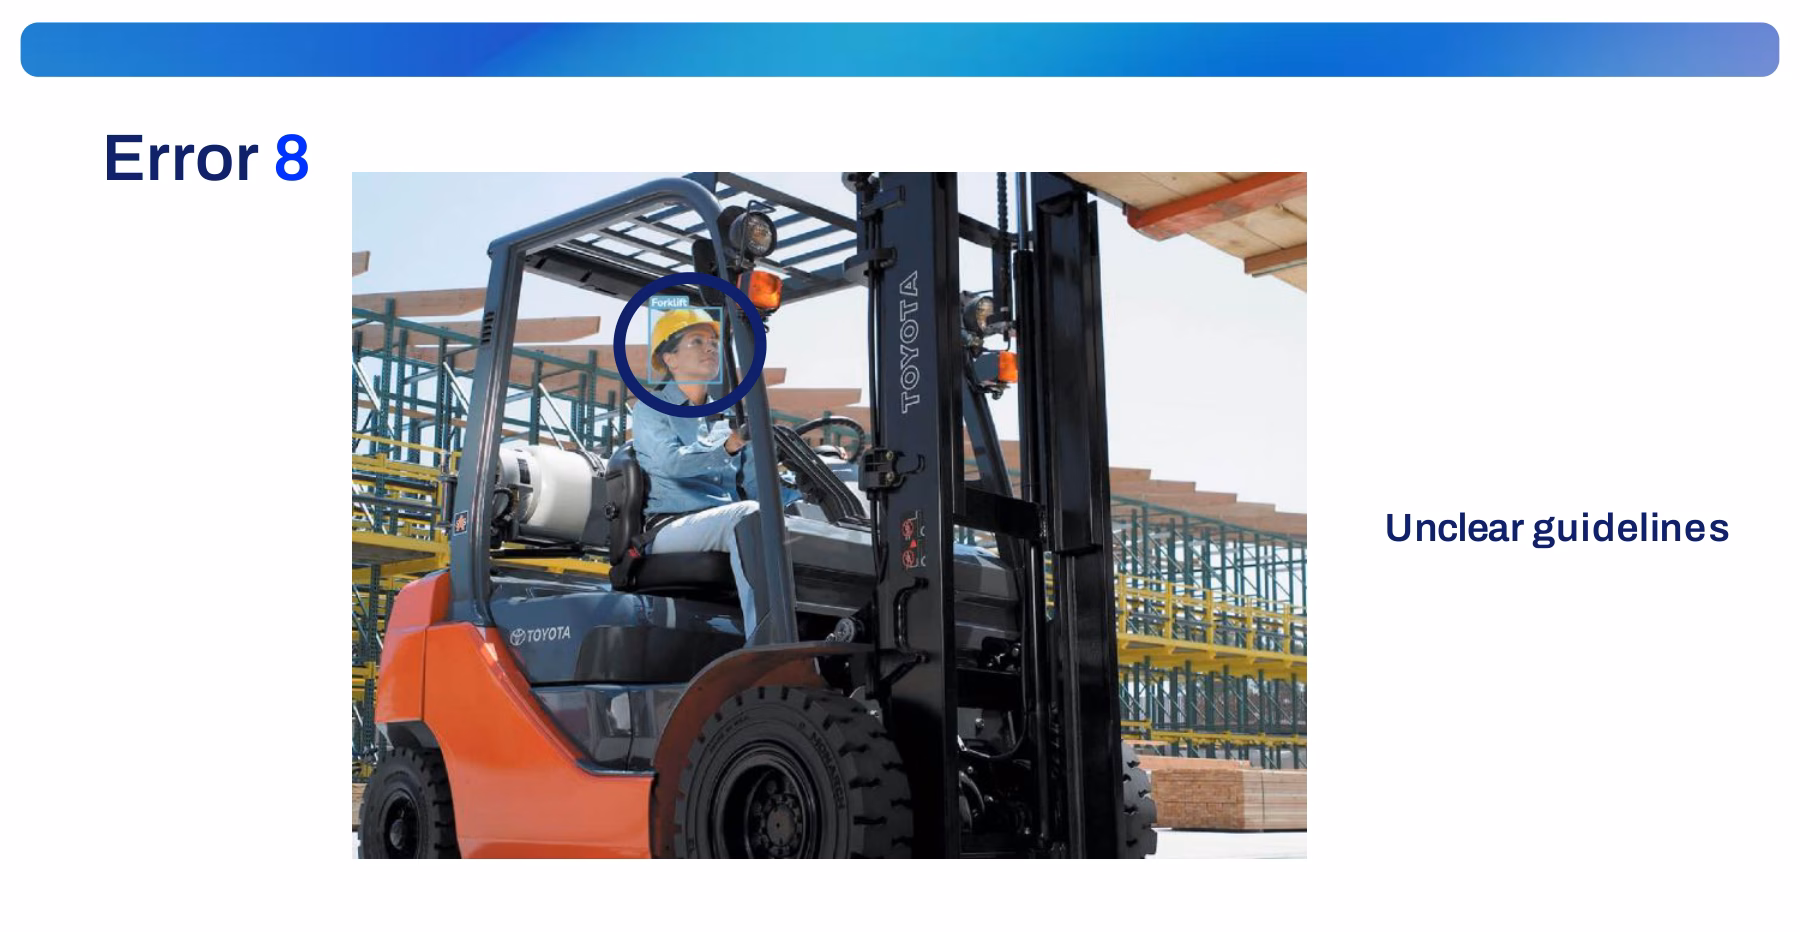
8. Unclear guidelines. Write the rule down the first time it's asked. "Do we label forklifts seen through warehouse glass?" should have one answer, not three.
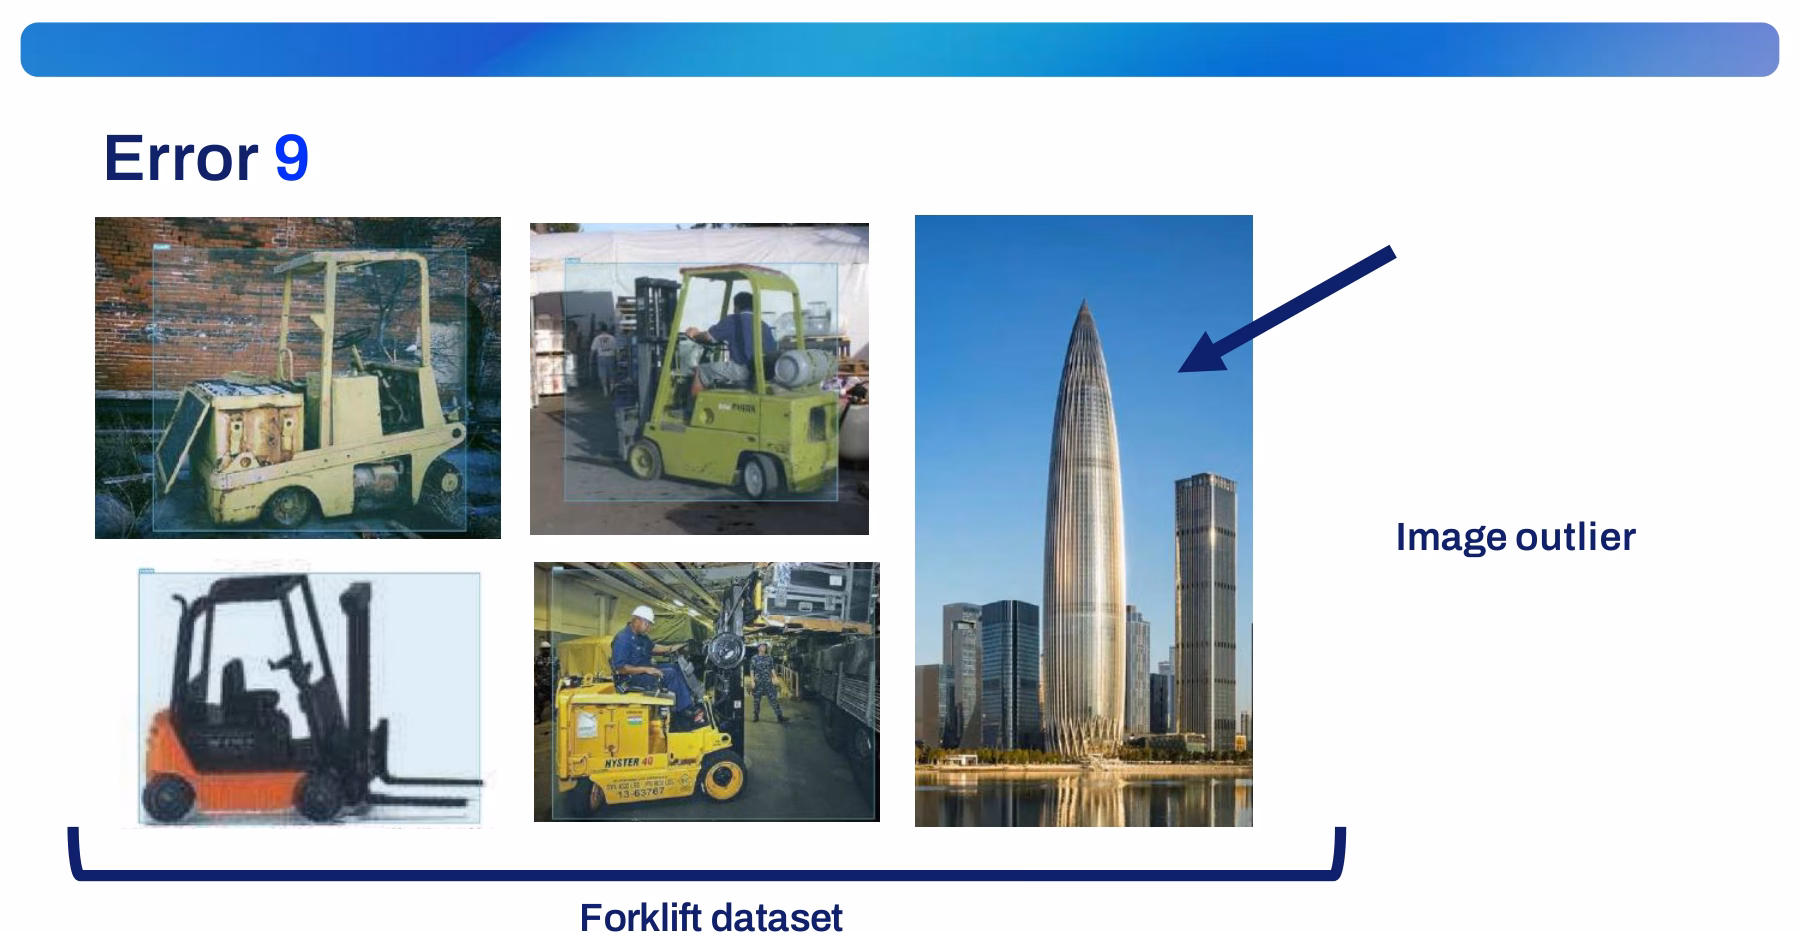
9. Image outlier. Drop images that don't match deployment. A stock photo of a toy forklift in a real camera-feed dataset teaches irrelevant features.
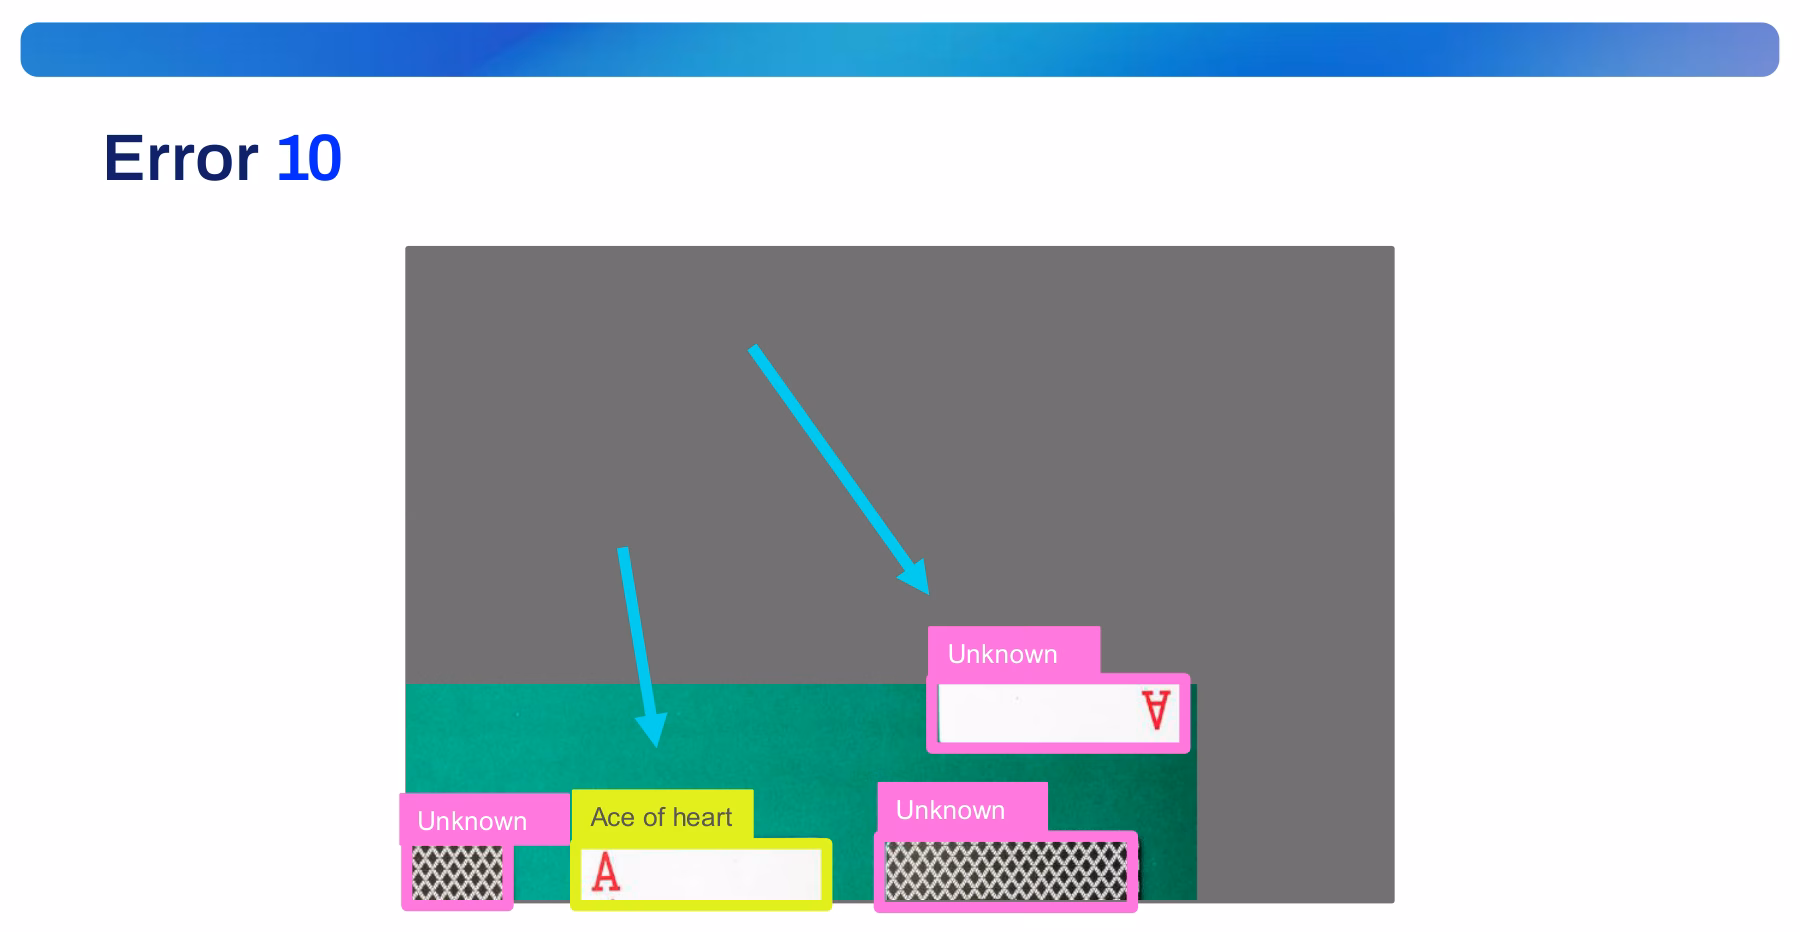
10. Augmentation-induced class ambiguity. Disable augmentations that can occlude an object's class-defining parts — translate, scale, and mosaic. Crop the pips off an Ace of hearts and it looks identical to a real unknown card: two look-alikes with two different classes.
Link to this sectionCalibrate annotators before scaling#
Before you have 20 annotators, run a calibration round:
- Hand the same 50 images to every annotator.
- Compare results pairwise — count cases where annotators drew differently.
- Use disagreements to expand the labeling guide.
- Repeat until inter-rater agreement is high (~95% identical labels).
Without calibration, annotators silently develop different conventions and your dataset becomes the union of 20 inconsistent micro-datasets.
Link to this sectionSmart annotation as an accelerator#
Modern tools (including Ultralytics Platform) let a model propose labels that annotators review and correct — typically a YOLO detector for boxes plus SAM 2.1 or SAM 3 for masks. Done well, this is a 5–10× throughput multiplier. Done badly, the model's mistakes get baked into the dataset. Two rules:
- Always have a human review every label. Don't auto-accept high-confidence detections silently.
- Bootstrap once, then iterate. Train v1 on 200–500 hand-labels, use it to propose v2 labels, review, retrain. Each iteration is faster than the last — this is the active learning loop.
Link to this sectionVerify by eye#
Open train_batch*.jpg (or the equivalent gallery in your labeling tool) at the start of every training run. Eyes catch:
- Boxes drawn around shadows, not objects.
- Class indices flipped.
- Half the dataset un-normalized.
- Polygons that don't close.
Metrics will not catch any of these. Five minutes of visual review prevents days of debugging.
Write the labeling guide for your project — one paragraph per class, plus your occlusion rule and your ambiguous-case log. Hand 20 images to two people independently. Count disagreements. Each disagreement is a guide entry.
You have a written labeling guide with class definitions, drawing rules, and an occlusion rule.
You've run a calibration round across at least two annotators.
Inter-rater agreement on a 50-image sample is ≥ 90%.
You've eyeballed the first 20 labeled images and confirmed boxes are tight.
Labels in hand. Next: a QC pass to find what's wrong before it costs you a training run.